XenForo is one of the most powerful and popular forum platforms available today. With its flexible design, high customization capabilities, and strong community support, XenForo 1 is a great choice for those who want to build a professional forum. In this article, we will go through the detailed steps to download and install XenForo 1 on your hosting, helping you to start your forum quickly and effectively.

Step 1: Prepare Hosting and Domain Name
Before downloading and installing XenForo, you need to prepare some basic elements such as hosting and domain name. These are the first steps to take to make your forum live on the internet.
1.1. Choose Hosting
To keep XenForo running smoothly, you should choose a hosting provider that offers high performance and supports XenForo’s technical requirements. Some of the minimum hosting requirements for XenForo 1 installation include:
- PHP version 5.2.4 or higher
- MySQL 5.0 or higher
- Minimum 2GB RAM (recommended)
- Supports cURL, GD, or Imagick for image processing
Some reputable hosting providers like SiteGround, Bluehost, or DigitalOcean can be good choices for XenForo installation.
1.2. Domain Name Registration
A domain name is the address that users will use to access your forum. You can register a domain name from providers such as Namecheap, GoDaddy, or Google Domains. After registering, you need to connect the domain name to your hosting by configuring DNS.
Step 2: Download XenForo 1
Once you have hosting and domain name, the next step is to download XenForo 1 from the official XenForo website. Follow the steps below to download the XenForo 1 installer to your computer:
2.1. Log In To XenForo Account
Visit the official XenForo website at xenforo.com. Log in to your XenForo account (if you don’t have one, you’ll need to register a new one). Once logged in, you’ll have access to the download section.
2.2. Download XenForo 1 Installer
Once logged in, go to the “Customer Area” section where you can find the XenForo 1 installation download link. Click the download button to start the process of downloading the .zip file containing the installation to your computer.
Step 3: Upload Files to Hosting
Once you have downloaded the XenForo installer to your computer, the next step is to upload the files to your hosting. You can use one of the popular FTP tools like FileZilla or use cPanel (if your hosting supports cPanel).
3.1. FTP Connection
Use FTP software like FileZilla to connect to your hosting. You will need your FTP server information, username, and password (usually provided by your hosting provider when you signed up for the service). Once you are successfully connected, you will see your hosting directories.
3.2. Upload XenForo Files to Hosting
In the FTP interface, find the root directory of the domain (usually the public_html or www). Extract the XenForo .zip file you downloaded earlier and upload the entire contents of the XenForo folder to the root directory of your domain on your hosting.
Step 4: Create MySQL Database
XenForo uses MySQL to store forum data, so you will need to create a new MySQL database for XenForo to use. You can create the database using cPanel or your hosting provider’s MySQL administration tool.
4.1. Create Database
In cPanel, find the “MySQL Databases” section. Create a new database by entering a database name and clicking “Create Database”.
4.2. Create MySQL User
After creating the database, you need to create a new MySQL user and grant this user access to the database. Enter the username and password, then assign this user to the newly created database and grant it All Privileges.
Step 5: Install XenForo
Once you have uploaded the XenForo files to your hosting and created a MySQL database, you are ready to begin the XenForo installation process. Open your browser and go to your domain’s URL. You should see the XenForo installation interface appear.
5.1. Start Installation
In the XenForo installation interface, click “Begin Installation”. You will be asked to enter the MySQL database information you created earlier, including the database name, MySQL username, and password.
5.2. Complete Installation
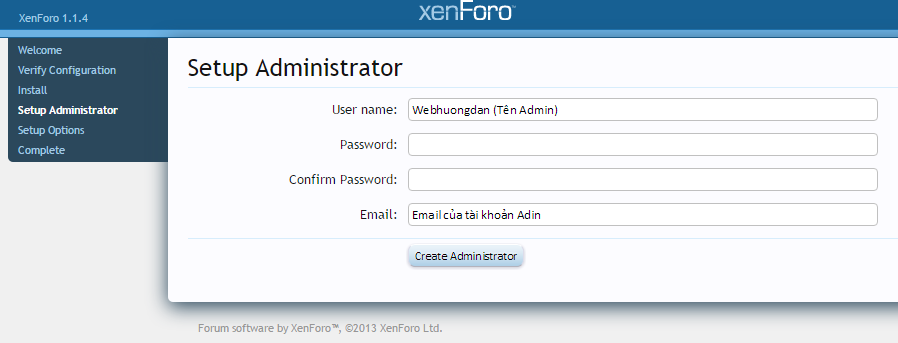
After entering the database information, XenForo will automatically install the database tables and set up the basic configuration. Once the installation is complete, you will be asked to create an administrator account. Fill in the required information and click “Create Admin Account” to finish.
Step 6: Test and Adjust
Once the installation is complete, you can access the XenForo admin dashboard to tweak your configuration and start building your forum. Some settings you may want to make immediately after installation include:
- SEO friendly URL and configuration
- Install add-ons and themes
- Customize user groups and permissions
- Test email functionality to ensure the forum can send announcements and communications
Install XenForo
Installing XenForo 1 on your hosting is a simple process if you follow the instructions correctly. By preparing your hosting, downloading XenForo, creating a MySQL database, and performing the installation, you can quickly launch a powerful, professional forum. Once installed, take the time to tweak and customize your forum to your liking to build a strong online community.


